Learning Quickshell, Part 1: QML Basics
I recently came across saneAspect’s video on YouTube video, showcasing a custom bar below with smooth & elegant animations.

I had only seen such animations, and UI design on Dribbble UIs, interactive websites (thanks to CSS & JS for making that easier) or proprietary operating systems like MacOS or new Android UI that have dedicated teams, bugdets, engineers,… You name it.
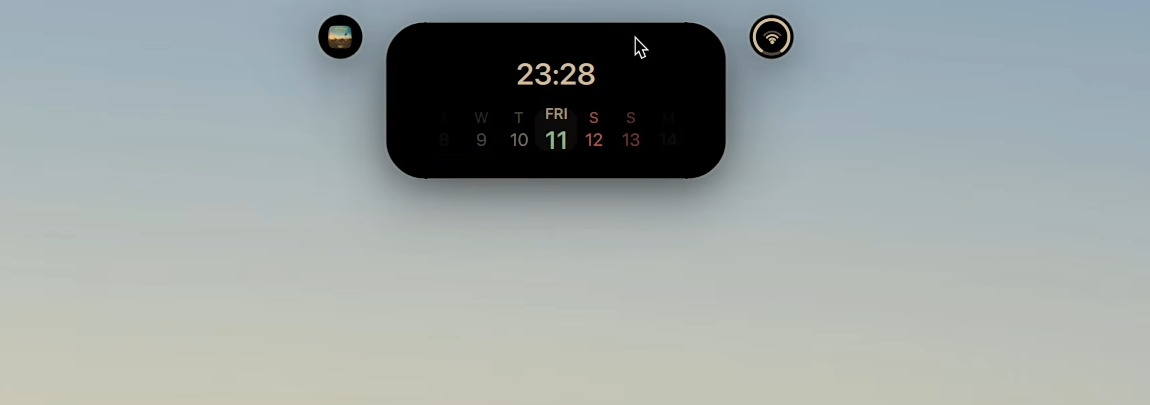 (Another component built with Quickshell)
I watched the full video and immediately jumped to YouTube’s search bar to see if I can learn about such thing. To my surprise, there weren’t that much videos where I could learn everything I needed to know. But on the otherside I kinda got to know everything I needed in order to start googling… “Quickshell”
What is Quickshell
Quickshell is a toolkit for building status bars, widgets, lockscreens, and other desktop components using QtQuick.
It can be used alongside your wayland compositor or window manager to build a complete desktop environment.
I’m currently interested in building a bar, but after reading what Quickshell can do, I might try to build other components as a part of my ricing process.
QtQuick is a module in Qt framework (the famous GUI framework), which allows developers to create modern UIs using QML.
import QtQuick

Rectangle {
    width: 100
    height: 100
    color: "red"
}
(I will be explaining what above code does later in this article.)
Qt Modeling Language is a markup language, and if you are familiar with other markup languages like HTML (combined with CSS), it should be easy to pick up the syntax and how things are declared in QML.
In this first part, I will go through the basics of QML before diving deep into Quickshell.
Installing Quickshell
Arch
yay -S quickshell
Fedora
sudo dnf copr enable errornointernet/quickshell

sudo dnf install quickshell
NixOS
{
  environment.systemPackages = [
    pkgs.quickshell
  ];
}
For early releases use:
{
  inputs = {
    nixpkgs.url = "nixpkgs/nixos-unstable";

    quickshell = {
      # add ?ref=<tag> to track a tag
      url = "git+https://git.outfoxxed.me/outfoxxed/quickshell";

      # THIS IS IMPORTANT
      # Mismatched system dependencies will lead to crashes and other issues.
      inputs.nixpkgs.follows = "nixpkgs";
    };
  };
}
QML Syntax
A QML file usually contains:
- Comments
- Import statements
- Object Declarations
Comments
The comments syntax in QML is the similar to other C-like programming languages (Java, C#, PHP, Typescript…).
Single-line comments
Single line comments start with //.
Example:
import QtQuick 6.0

Rectangle {
  // properties
  id: pill
}
Double-line comments
Double line comments start with /* and ends with */.
Example:
import QtQuick 6.0

/*
* Rectangle object used to create a bar.
*/
Rectangle {
  // properties
  id: pill
}
Imports
As you attempt to write Quickshell components, you will need to import QML Modules, QML documents or even Javascript files.
JavaScript file imports must be qualified (aliased) when imported, so that the properties and methods they provide can be accessed.
An import statement looks like this:
import <ModuleIdentifier> [<Version.Number>] [as <Qualifier>]
import "<Directory>"
import "<JavascriptFile>" as [as <ScriptIdentifier>]
Example:
import QtQuick 6.0
import QtQuick.LocalStorage as Database
import "../privateComponents"
import "file.js" as Script
Implicit imports QML imports any types in neighboring files with names that start with uppercase letters.
Example (from Quickshell official documentation):
bar
|-Pill.qml
|-shell.qml
Pill.qml will be imported as a usable type in shell.md.
Object Declarations
Objects in QML are imported module instances. In our previous example, Pill object can be imported in shell.qml).
Object names must start with an uppercase letter, which distinguishes it from a property.
An example:
import QtQuick 6.0

Rectangle {
    // properties
    width: 100
    height: 100
    color: "red"

    property string icon: "fa-settings"

    // functions

    // signals
}

Rectangle: Is the name of the object declared.
Properties
width, height, color : These are the properties of Rectangle object. They define the characteristics of an object.
Properties in QML can be defined using the following syntax:
<modifier> property <type> <name>[: assignment]
Modifiers:
- required: As the name suggests,
requiredproperties are mandatory at the time of creating an instance of the object.- default: An object definition can have a single
defaultproperty. When one object is nested directly inside another object without specifying a property, it is automatically assigned to the enclosing object’sdefaultproperty.- readonly: Properties defined with
readonlymodifier are not assignable.It’s worth mentioning that modifiers are optional.
There’s one important property to mention, especially when making Quickshell components: id.
There can be one id property per QML element. This property is provided by the Framwork itself, hence it can not be redefined or overridden by any QML object type.
It must begin with a lower-case letter or an underscore, and cannot contain characters other than letters, numbers and underscores. It can also not be a JavaScript keyword.
Functions
Functions in QML follow the same scoping rules as properties, and they are declared inside an Object body.
Syntax:
function <name>(<paramname>[: <type>][, ...])[: returntype] {
  // Expressions
  // mandatory 'return' statement.
}
Example from Quickshell official documentation:
ColumnLayout {
  property int clicks: 0

  function makeClicksLabel(): string {
    return "the button has been clicked " + clicks + " times!";
  }

  Button {
    text: "click me"
    onClicked: clicks += 1
  }

  Text {
    text: makeClicksLabel()
  }
}
Signals
You can think of signals, the same way states work in React.JS or any other front-end framework. Where you can react (connect/retrieve updates) to an event which has occured on the object.
Syntax:
signal <signalName>[([<parameterName>: <parameterType>[, ...]])]
Objects are notified through signal handlers; which are special functions that make connections.
Example of making a connection (from Quickshell official docs):
ColumnLayout {
  property int clicks: 0

  function updateText() {
    clicks += 1;
    label.text = `the button has been clicked ${clicks} times!`;
  }

  Button {
    id: button
    text: "click me"
  }

  Text {
    id: label
    text: "the button has not been clicked"
  }

  Component.onCompleted: {
    button.clicked.connect(updateText)
  }
}